7 Causes Of Hydrangea Leaf Chlorosis & Their Fixes
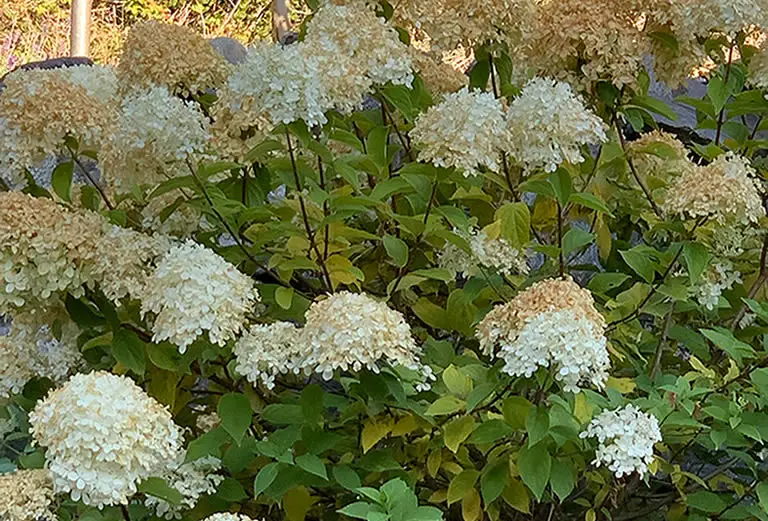
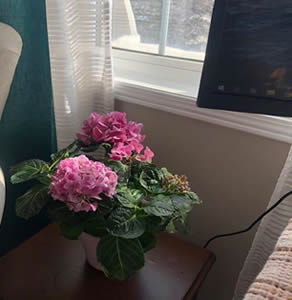
Hydrangeas are grown as both yard plants and houseplants. They are easy care plants that come in beautiful shades of lavender, sky blue, green, white and pink. However, nothing detracts from the natural beauty of the flowers faster than noticeably yellowing leaves.
If you have other houseplants or garden plants that you care for then you will already know that this leaf yellowing effect is likely a sign of distress, so what’s going on with your plant?
Table of Contents
- The 7 common causes for yellowing hydrangea leaves
- Low soil acidity can often lead to a paling of hydrangea leaves
- Insufficient soil nutrients will lead to chlorosis in hydrangea leaves
- Temperature fluctuations & drafts can distress a hydrangea enough to cause leaf yellowing
- Underwatering causes dehydration which will often lead to yellowing leaves
- Overwatering is a serious problem that can lead to more than yellow leaves
- Incorrect lighting is a very common cause for discoloration in hydrangea leaves
- Plant diseases will distress the plant enough to damage its foliage & cause leaf chlorosis
The 7 common causes for yellowing hydrangea leaves
7 common reasons hydrangea leaves turn yellow:
- Low soil acidity.
- Lack of nutrients.
- Temperature changes and drafts.
- Underwatering.
- Overwatering.
- Too little or too much sunlight.
- Plant diseases.
If you’re not sure which issue (or issues) is affecting your hydrangea fear not because I’ll explain each discoloration cause in much more detail below.
I advise you to read through the entire article as there may be more than one cause for the yellowing leaves on your hydrangea.
Even if there is only one cause, knowing all potential causes will reduce the likelihood of you misdiagnosing the problem. I will also provide actionable solutions so you can easily nurse your hydrangea back to perfect health!
Low soil acidity can often lead to a paling of hydrangea leaves
Most flowering houseplants (and yard plants) – from fruits and vegetables, to flowering perennials like the hydrangea – prefer acidic soil.
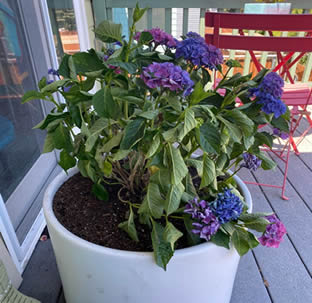
This is especially true if your hydrangea produces purple or blue flowers, as the depth of these gorgeous colors is much more pronounced and vibrant when the plant is growing in acidic soil.
The lighter shade of hydrangea, such as pink and white hydrangea flowers for example, are okay with more neutral soil though I personally prefer to use a more acidic soil for all hydrangea plants or add a fertilizer that helps to maintain the correct pH levels.
If the leaves of your hydrangea are yellow and you suspect that neutral or basic soil might be the culprit, then look no further than the flowers for confirmation.
Hydrangea flowers will be very pale, and not in the pretty pastel way that hydrangea flowers sometimes are. Rather, the colors will look muted and lack vibrancy.
How to fix low soil acidity
First, you need to know what pH range you’re aiming for with your hydrangeas.
Pink, white and paler-colored flowered hydrangea plants prefer a soil pH of 6.5 and up, which is more alkaline or basic. Plants that have blooms with deeper hues, such as purple or green flowers, will produce their deepest and richest colors if you maintain a pH between 5.5 and 6.5. For blue flowers, a baseline pH of 5.5 is required but feel free to go a little lower if 5.5 isn’t producing the type of color you desire.
Next, you need to test your soil pH, which you can do with a testing kit. Dig up about three teaspoons of soil from your hydrangea pot. Then transfer the soil to a clean bowl or glass.
Add a bit of distilled water, stir the ingredients, and drain the extra water. Put a pH testing strip in and wait for a reading. Alternatively, you can use an inexpensive moisture and ph testing meter which will also come in handy later when you want to check your plant for underwatering and overwatering.
If the soil of your hydrangea is alkaline or neutral, you need to take steps to make it more acidic. The best way to do that is with soil amendments. Sphagnum moss or peat moss prevents the soil from compacting and betters soil drainage while also raising the soil’s acidity. You can scatter sulfur chips in your hydrangea soil as well.
However, the easiest way is to simply use a fertilizer that helps maintain the correct acidity in the soil while also feeding the plant.
Insufficient soil nutrients will lead to chlorosis in hydrangea leaves
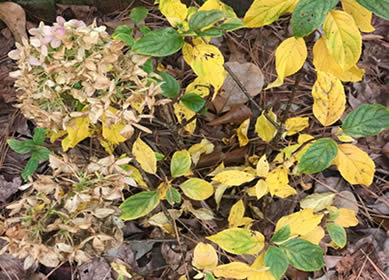
When human beings don’t eat properly and get enough vitamins and minerals they can begin developing negative health side effects. Their skin will often become pale and lackluster looking. Well, plants are not that different.
A hydrangea plant that is robbed of nutrients will almost certainly develop chlorosis (yellowing) in its foliage.
Houseplants are often more susceptible to nutritional deficiencies than outdoor plants.
Yard plants usually have a larger growing medium to source much-needed nutrients, and because nature naturally recycles organic material to produce more food for outdoor yard plants they usually require less attention than houseplants.
On the other hand, a houseplant is stuck in a pot with limited resources and thus has a very limited growing medium with no natural sources for extra nutrients. This is one good reason to repot houseplants regularly (though there are others, such as root development for example).
It is also why houseplants require a much stricter fertilizing routine than most outdoor plants.
When a hydrangea houseplant is deficient in nutrients, its leaves will be the first to show the signs. You can expect hydrangea leaves to become discolored and yellow.
Be aware though that although the hue of a nutrient-deficient hydrangea leaves are most likely to be yellow, some leaves can turn a brownish color as well.
With nutrient-deficiency in hydrangeas, the upsetting changes in leaf color are often accompanied by slowed or stopped growth and reduce blooms or no blooms at all.
You may find that although your hydrangea was flowering a few weeks ago, no new growth has appeared and the flowers look lack luster and they may even be subject to the same changes in color.
Plants, like all living organisms, need nutrients for growth and survival. Without a balance of macronutrients, or with no nutrients at all, a plant cannot photosynthesize, reproduce, or grow.
Additionally, if a plant is afflicted with a disease or injury, its chances of survival are far lower than usual. For the reasons I mentioned previously this is especially true of houseplants.
How to properly replace hydrangea soil nutrients
That’s why you must fertilize your hydrangeas throughout the year. You have three fertilizer options: spikes, granules, or liquid. Let’s talk about all three types of hydrangea fertilizer now.
-
- Spike fertilizer: Compressed spikes can dig deep into the soil of your hydrangea to ensure they reach the roots. Then, over several months (typically two or three), the spikes will naturally dissolve slowly for slow-release nutritional support. This means to maintain good nutrition in the soil you only have to replace the spike every few months.
- Granular fertilizer: Smaller than spike fertilizer but still solid, granular fertilizer is water-soluble. You can drop the granules onto your hydrangea soil or dissolve them in water and pour them in. They too will begin to gradually dissolve, releasing nutrients over a long period.
- Liquid fertilizer: The third type of hydrangea feed is liquid fertilizer (my preferred feeding method as I can regulate how much feed the plant gets). When you pour liquid fertilizer straight into the hydrangea soil, the roots absorb it fast. Most liquid fertilizer requires dilution with water to reduce the concentration somewhat. You will also need to fertilize the plant manually and regular intervals.
When spring begins in March, it’s the active growing season for many houseplants, including hydrangeas. At this point, you should begin your feeding routine.
Apply liquid fertilizer to your hydrangea because this stuff, as I mentioned previously, is fast-releasing.
When you apply a liquid fertilizer to a hydrangea, either by spraying or pouring it, focus more on the branch drip line of your hydrangea rather than the center of the soil.
The dripline is the area located under the foliage that is the furthest away from the center of the plant.
So rather than applying feed to the center of the plant it is best to concentrate it mostly in the outer areas of the pot.
If you’d rather use a slow-release fertilizer such as granular or spike fertilizer, then cover either type with some soil after you insert them. Please don’t use both types of fertilizer though, as that’s excessive.
Also, remember that slow-release fertilizer lasts for three months at a time, so there’s no need to reapply it any sooner than that whereas you need to apply liquid fertilizer every 3 – 4 weeks during growing season.
Throughout the spring and summer, continue to fertilize according to the schedule required whether you’re using slow-release or fast-releasing hydrangea fertilizer. Continue doing this until the winter begins when you stop feeding your plant.
During the winter, your hydrangeas will go dormant. This is normal, so don’t panic when the plant starts to lose foliage. Just before winter ends you can apply a little fertilizer to the soil as they will help your hydrangea get ready for the active growing season ahead.
Temperature fluctuations & drafts can distress a hydrangea enough to cause leaf yellowing
If your pH tests show the acidity of the soil is within range and you’re fertilizing your hydrangeas on schedule but you still have yellow leaves on your hydrangea it’s time to look for other culprits.
There are still many more issues that could be causing leaf yellowing, and another common one is temperature fluctuations.
Hydrangeas grow best in temperatures of 50° to 60° Fahrenheit. This is noteworthy because many houseplants grow in room temperature range, which is typically between 65° F and 80° F with the most common US households being kept at a consistent 70° F.
These plants are popular houseplants because when grown in the home or at the office, there’s no need to adjust your thermostat or the local humidity levels.
This plant can survive well in cool temperatures but it will not fair well in the cold. Although the hydrangea is surprisingly frost-resistant, once temperatures start getting into the 20s, the plant is in serious danger. If the temps are in the low 10s, that danger is more severe still.
Obviously this is more of a concern with outdoor plants so if you keep potted hydrangea outside you should bring them indoors in very cold weather conditions or even consider relocating them inside for the duration of the winter.
In chilly temps, a hydrangea plant will experience cold stress. This is when you’re likely to see leaf yellowing.
If the plant has begun freezing you may see some black spots appearing as well. If the plant is continually exposed to biting cold its cells freeze and sometimes rupture. These areas will look like they’ve been burned. Rather than yellow or brown, the spots will be black.
Hydrangeas are usually not heat-tolerant either, but this greatly depend on the species. Once temperatures start climbing above 60 degrees most hydrangeas will suffer the effects of heat stress, which causes flower dropping, wilting, leaf rolling, as well as leaf discoloration.
How to properly regulate the temperatures around your hydrangea
The solution here is rather simple: keep temperatures in a comfortable range for your hydrangea. By maintaining its preferred temperature range (which is also the preferred temperature range for humans), your hydrangea will be happy.
It’s okay if the temps dip by a few degrees or go higher than the recommended range, but you don’t want huge temperature fluctuations.
On that note, watch where you place your hydrangea.
Avoid any sources of air such as a drafty door or window, an air conditioning unit, a radiator or space heater, or even your fridge or freezer. Try as best you can to keep the temperature of the localized environment around your hydrangea consistent and regular.
Underwatering causes dehydration which will often lead to yellowing leaves
If you read our post on snake plant watering, then you may recall the advice I gave and see how it is applicable to watering a hydrangea.
You shouldn’t water all your houseplants on a set schedule. When you do, it doesn’t accommodate for changing needs the houseplant has throughout the year and you will likely water one plant more than it needs (take succulents for instance) while underwatering another.
Take, for example, seasonal changes. It’s a lot hotter in the summer than it is in the winter. When you water a houseplant on a schedule, you give the plant the same amount of water no matter the time of year.
A big problem with many houseplants is root rot. Root rot occurs when you overwater a plant and because it is such a common problem (especially with succulents) many houseplant owners are fearful of overwatering their plants.
However, hydrangeas require more watering that most other common houseplants and can become dehydrated when they are underwatered.
It is often only when the leaves of a hydrangea turn yellow and brittle that the plant owner realizes it probably needs some water.
However, there are tell-tale signs you will see before a yellowing of the leaves and if you spot them earlier enough you will avoid leaf-yellowing in your plant.
Underwater hydrangeas have foliage that looks wilted and dry. The leaves may also curl slightly and if the plant is in bloom the flowers will sag and lack luster and vibrancy.
How to fix yellowing in hydrangeas leaves caused by underwatering
Hydrangeas are tricky houseplants when it comes to watering them. They need copious amounts of water, but they also hate to grow in standing water or water soaked soil.
Be absolutely sure that your hydrangea is dehydrated due to a lack of water and not due to it be given too much water (more on this later).
Be aware before you grab that watering can that an overwatered hydrangea displays the same symptoms as an underwatered one!
Though overwatering is a serious problem if you skimp on its water requirements even a little bit, your hydrangea will be quick to show it. These blooming perennials are more sensitive to both underwatering and overwatering than many other houseplants – the latter issue which we’ll talk about in just a moment.
The best way to determine if your hydrangea is underwater is to check the moisture levels in the soil. By using an effective but cheap moisture and pH tester, or by sticking your finger into the soil, you will quickly tell if the plant needs water.
So, to get your hydrangea watering habits on the right track, you need to be mindful about the moisture levels in its soil. With clean hands, stick a finger knuckle-deep into the soil. When you remove your finger from moist soil it will have small amounts of soil residue stuck to it. Dry soil will mean your finger comes out clean or with dry soil that is easily blown away.
If it’s moist, and the plant has yellow leaves then the plant has likely been overwatered and you will need to follow the advice given in the section below.
About every day to every other day, you should repeat this moisture test, though the frequency will vary throughout the year, until you get to know your individual plant’s watering needs. For instance, in the summer, when hydrangea water requirements go up, it’s worth testing the soil every single day.
In the winter, when the hydrangea is dormant, you can test its soil moisture with your fingers every couple of days though be aware that the plant will require much less water when it is resting, sometimes requiring no watering at all.
Overwatering is a serious problem that can lead to more than yellow leaves
If your hydrangea turned brittle and its leaves yellow this is a sign of dehydration. As you seen in the section above this can be caused by underwatering. However, overwatering can also cause dehydration, as counterintuitive and strange as that may sound.
Overwatering can choke off oxygen to the roots, which your houseplant needs to survive. The damp water-soaked soil will also mean plant roots will begin to die as root rot takes hold.
When the roots start to rot they become unable to absorb moisture from the soil and distribute it to the rest of the plant. Thus the plant becomes dehydrated even though it is sitting in an abundance of water.
Rotting roots will turn slick and black with a mushy texture and a rotting smell.
The leaves of your hydrangea might fall off, and the ones that are still attached will be yellowed or brown and be mushy at the stem. Your poor hydrangea flowers will have likely lost their charming colors as well, if any remain on the plant.
The importance of identifying and treating an overwatered hydrangea
Testing the level of soil moisture with your fingertips as we explained in the last section is your best means of preventing overwatering (underwatering too). As we said before, when your hydrangea soil feels very moist, step away from the watering can.
If you suspect your overwatering habits are causing serious problems since your hydrangeas look sad and droopy, then I highly recommend replacing the plant’s soil. You’ll have to pull your hydrangea out of the pot.
You will need to inspect the rootball before repotting. If there are signs of root rot the plant must be treated immediately.
If root rot has taken hold, you will need to trim away any black or brown roots using clean pruning shears and a sharp knife. Don’t forget to disinfect the shears when you’re finished.
There are several detailed walkthrough guides for treating root on this website and a simple search will show you several articles dedicated to it, if you need more detailed information on this topic.
Once successfully treated for root rot replant your hydrangea in a fresh pot and reduce your watering schedule only watering the plant when the soil is dry.
Incorrect lighting is a very common cause for discoloration in hydrangea leaves
Like every plant, the hydrangea needs sunlight, but it can be a careful balancing act when you want to get the most from your plant.
Putting your hydrangeas in a dark corner will cause their lovely blooms to become desaturated in a hurry and will rob the foliage of much needed sugars created through photosynthesis. Leaves will become discolored quickly when the plant isn’t getting enough light.
The only exception is the climbing hydrangea, which can grow in full shade.
Overexposure to the sun will scorch the leaves however, and so this is to be avoided also. In fact, too much sun is a more common cause of yellowing hydrangea leaves than too little sun.
If your hydrangea is getting too much direct sunlight it will try to tell this through yellowed leaves. Without your intervention, those leaves will quickly turn brown, then black as they burn.
How to give your hydrangea the incorrect light
Where you put your hydrangea matters a lot if you want your plants to maintain its full depth of color and have appealingly green leaves.
SIf your hydrangea is an indoor plant in your home then you will likely have an option of four window directions: north, south, east, and west.
Northerly-facing windows get no direct sunlight, southerly-facing receive direct sun three feet from the window, and westerly and easterly-facing windows get indirect sun from five feet away and direct sun from three feet.
Direct sunlight for hydrangeas is appropriate in the morning. Once the afternoon sun strengthens, the direct light is too scorching, so provide indirect light to partial shade. Dappled shade is another option.
Allow me to explain some of these “light” terms.
Direct light is the type of light a plant gets when it sits directly in the sun. This could be outdoors on close to a sun-facing window.
Indirect light is any type of natural light that is not accompanied by direct UV rays from the sun i.e. a well lit area in a room away from a window. It can also be sunlight that passes through a non-glass medium before reaching your plant like direct sunlight that only reaches your plant after going through a curtain.
Partial shade refers to periods of direct sunlight (usually three to six hours) with some indirect light and some shade the rest of the time.
Dappled shade means your hydrangeas have overhead cover, such as a larger tree or plant. The sun comes through directly, but the cover of the bigger plant allows the sunlight in only sporadically through the openings in the branches or leaves.
Hydrangeas can grow in direct sun as long as they are well watered an watered often. However, if the leaves begin to turn yellow consider relocating the plant to an area of partial shade or somewhere that gets good strong indirect light.
Plant diseases will distress the plant enough to damage its foliage & cause leaf chlorosis
As beautiful as they are, hydrangeas can quickly have their beauty robbed by a variety of diseases.
These diseases include:
- Viral
- Bacterial
- Fungal diseases
Here’s a list of diseases so you know what to keep an eye out for.
- Tomato ringspot virus: Distortions and yellowing across the hydrangea’s leaves are one noticeable sign of tomato ringspot virus. Slowed growth will soon follow. Tomato ringspot virus is caused by nematodes.
- Hydrangea mosaic virus: Aphids, which are a microscopic insect species, can afflict your hydrangeas with mosaic virus. The mosaic pattern in a distinct yellow hue is the most telltale symptom of this disease.
- Hydrangea ringspot virus: Small rings throughout the foliage of your hydrangea in hues like yellow, brown, or red are indicative of hydrangea ringspot virus. Growth will again stop and the leaves can roll as well.
- Rust: The Pucciniastrum hydrangea fungus causes rust. Not all hydrangea species are affected. This bacterial disease leads to yellow spots and orangey pustules underneath the plant’s leaves.
How to treat disease in a hydrangea
Those are just a handful of hydrangea diseases, but they’re the only ones that can cause leaf yellowing.
We recommend looking for signs of aphids or nematodes in your plant’s soil. It’s worth replacing the soil if you spot these unwanted critters. Treat your hydrangea with a good organic insecticide.
Unfortunately, some hydrangea diseases have no cure, such as tomato ringspot virus and hydrangea ringspot virus. All you can do is stop the spread of the diseases so the rest of your indoor garden isn’t affected. Unfortunately, you’ll have to throw away any infected plant.
To treat plant rust, a bit of baking soda will probably do the trick. You can also try a fungicide such as neem oil for all other hydrangea diseases.
Thanks for reading! I'm Michael — houseplant fanatic and your Pinterest plant guide.
Follow me on Pinterest for fresh updates 🌿


