10 Common ZZ Plant Problems & Their Fixes
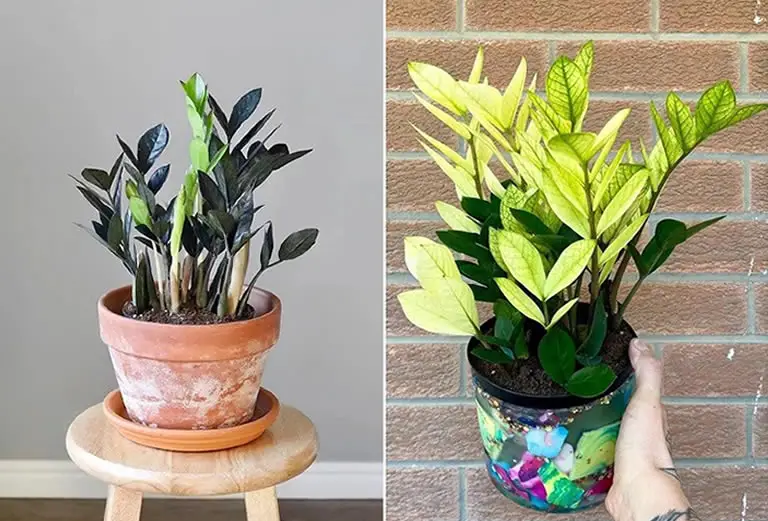
The ZZ plant is a very popular succulent houseplant found in homes across the US. Although there are different varieties of ZZ plant, each one require the same care and is thus subject to the same problems. So regardless of which variety of ZZ plant you own this guide will help you identify and treat any problems your particular plant may have.
You can read our ZZ plant care guide for additional information on cultivating a healthy, vibrant succulent.
Table of Contents
- How To Identify & Treat ZZ Plant Problems
- 1. Understanding and Resolving ZZ Plant Leaves Turning Yellow
- 2. Addressing Curling Leaves on Your ZZ Plant: Causes, Treatments, and Prevention
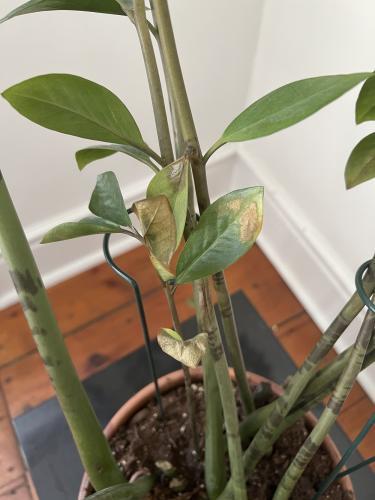
- 3. Dealing with Brown Tips on ZZ Plant Leaves: Causes, Remedies, and Prevention
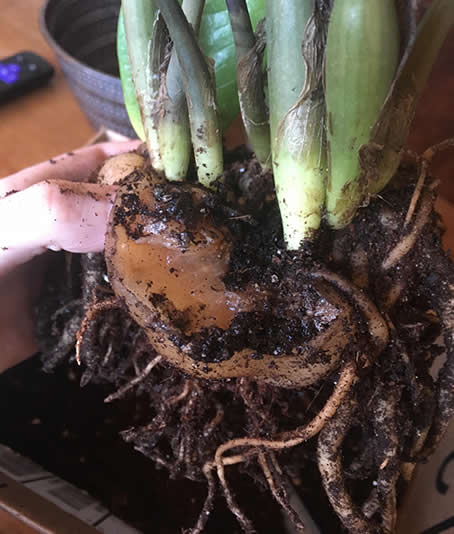
- 4. Battling ZZ Plant Root Rot: Causes, Cures, and Preventive Measures
- 5. Unravelling The Causes Behind Slow Growth: Solutions and Growth-Boosting Strategies
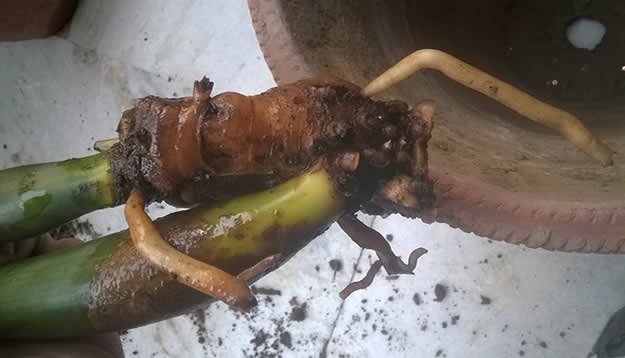
- 6. Tackling Mushy Stems on ZZ Plants: Causes, Solutions, and Salvaging Tips
- 7. Reviving Drooping Stems on ZZ Plants: Causes, Solutions, and Restoration Tips
- 8. Battling Mealybugs on ZZ Plants: Identification, Eradication, and Prevention Strategies
- 9. Confronting Spider Mites on ZZ Plants: Identification, Elimination, and Prevention Strategies
- 10. Understanding and Addressing Loss of Lower Leaves: Causes and Remedial Measures
- Quick Summary Of The 10 Most Common ZZ Plant Problems & Their Remedies
List Of The 10 Most Common ZZ Plant Problems
Below is a list of the 10 most common plant problems encountered by ZZ plant owners.
- Yellowing Leaves: One of the most common issues, yellowing leaves can indicate overwatering, underwatering, or other stress factors. Properly assessing the watering needs and adjusting accordingly can help address this problem.
- Leaves Curling: Curling leaves can be a response to underwatering or low humidity. Ensuring a consistent watering schedule and providing a suitable humidity level can help prevent leaf curl.
- Brown Tips on Leaves: Brown tips can be a result of dry air, over-fertilizing, or using water with high fluoride content. Adjusting the plant’s environment, reducing fertilization, and using distilled or filtered water can help prevent this issue.
- Root Rot: Overwatering and poor drainage can lead to root rot, a fungal disease that affects the roots. To prevent root rot, it’s crucial to let the soil dry out between waterings and ensure proper drainage.
- Slow Growth: ZZ plants are known for their slow growth, but extremely slow or stunted growth may indicate issues with light, soil, or nutrition. Providing adequate light and using well-draining soil can promote healthier growth.
- Mushy Stems: Mushy stems can be a sign of overwatering or rotting. Adjusting the watering frequency and ensuring proper drainage can help prevent stem issues.
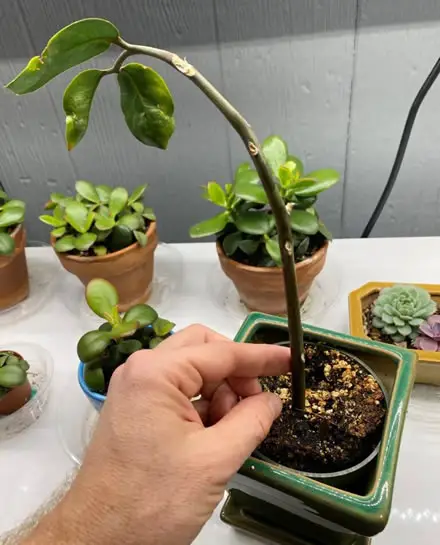
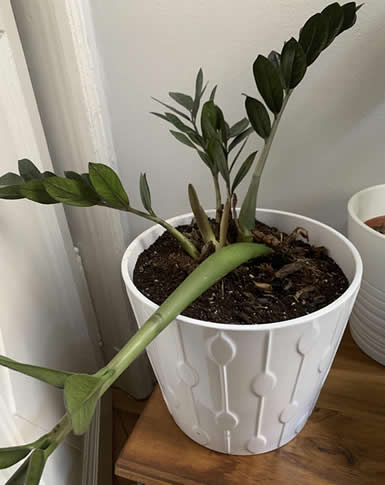
- Drooping Stems: Stems that appear weak or drooping can result from underwatering or a lack of support. Providing adequate water and possibly staking the plant can help address this problem.
- Mealybugs: ZZ plants are generally resistant to pests, but mealybugs can sometimes be an issue. These pests appear as white, cottony clusters and can be controlled with insecticidal soap or neem oil.
- Spider Mites: In dry conditions, spider mites may infest ZZ plants, causing stippling and webbing on leaves. Increasing humidity and regularly spraying the plant with water can help deter spider mites.
- Loss of Lower Leaves: It’s normal for older leaves to yellow and drop, but excessive leaf loss, especially from the lower part of the plant, may indicate issues with light, overwatering, or a need for repotting.
Addressing these problems promptly and adjusting care based on the specific needs of your ZZ plant can contribute to a healthier and more resilient indoor plant.
Regular observation and proactive care are essential for preventing and managing these issues.
Let’s take a closer look at each of the problems mentioned above to see how to treat an affected ZZ plant and also so you can avoid potential future problems from occurring.
How To Identify & Treat ZZ Plant Problems
I will address each of the 10 problems mentioned above.
I will show you how to identify the potential cause for each problem and give you detailed advice for treating the plant. Additionally, I will add solid advice for ensuring there is no reoccurrence of the problem.
Let’s start with the most common problem: yellowing leaves.
1. Understanding and Resolving ZZ Plant Leaves Turning Yellow
ZZ plants (Zamioculcas zamiifolia) are renowned for their resilience, making them a popular choice among houseplant enthusiasts. However, like any plant, ZZ plants can encounter issues, and one common concern is the yellowing of leaves.
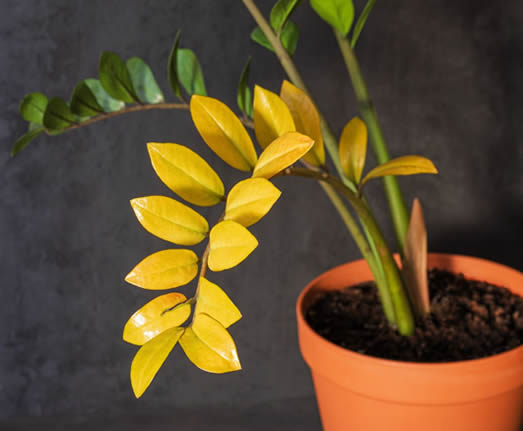
Understanding the causes behind this phenomenon and implementing effective solutions is crucial for maintaining the health and vibrancy of your ZZ plant.
Causes of ZZ Plant Leaves Turning Yellow
1. Overwatering
- One of the primary reasons for yellowing leaves in ZZ plants is overwatering. These plants prefer a well-draining soil mix and are prone to root rot if their roots are consistently submerged in water. The excess moisture limits the uptake of nutrients, leading to yellowing foliage.
2. Underwatering
- On the flip side, underwatering can also result in yellow leaves. ZZ plants are resilient, but they still require a consistent watering schedule. Insufficient water affects the plant’s ability to carry out essential processes, causing leaf discoloration.
3. Poor Drainage
- ZZ plants thrive in well-draining soil. If the soil retains excess water, it can contribute to both overwatering and poor root health. Ensuring proper drainage by using a well-aerated potting mix is crucial for preventing yellowing leaves.
4. Low Light Levels
- While ZZ plants are adaptable to low light conditions, they still require some indirect sunlight. Inadequate light can hinder the plant’s photosynthesis process, leading to nutrient deficiencies and yellowing leaves.
5. Nutrient Imbalance
- ZZ plants are not heavy feeders, but they do require a balanced supply of nutrients. Yellowing leaves may indicate a nutrient imbalance, particularly nitrogen deficiency. Using a balanced, water-soluble fertilizer can help rectify this issue.
Treatment and Prevention Of Yellowing Leaves
1. Adjust Watering Practices
- Allow the top inch or two of the soil to dry out before watering your ZZ plant again. Create a consistent watering schedule, ensuring that the plant receives moisture without becoming waterlogged.
2. Improve Drainage
- Repot the ZZ plant in a well-draining potting mix, and make sure the pot has drainage holes. This helps prevent water from pooling around the roots and promotes a healthier root system.
3. Provide Adequate Light
- Ensure your ZZ plant receives sufficient indirect sunlight. If placed in a low-light environment, consider moving it to a brighter spot while avoiding direct sunlight, which can scorch the leaves.
4. Check for Root Rot
- If yellowing persists, carefully inspect the roots for signs of rot. Trim affected roots and repot the plant in fresh soil. Ensure the new soil is well-draining to prevent future issues.
5. Fertilize Appropriately
- Feed your ZZ plant with a balanced, diluted fertilizer during the growing season. Follow the recommended dosage on the fertilizer package to avoid overfeeding.
By addressing the root causes of yellowing leaves and implementing these preventive measures, you can ensure the continued well-being of your ZZ plant.
Regular observation, proper care, and a responsive approach to any issues that arise will contribute to a thriving and lush ZZ plant in your indoor space.
2. Addressing Curling Leaves on Your ZZ Plant: Causes, Treatments, and Prevention
Thanks for reading! I'm Michael — houseplant fanatic and your Pinterest plant guide.
Follow me on Pinterest for fresh updates 🌿


