How to Propagate Haworthia (Haworthia spp.): Step-by-Step Guide for Every Method
Looking to grow your collection of charming Haworthia succulents? These petite plants are not only easy to care for—they’re also wonderfully simple to propagate. Whether you’re working with a single variety or several, this guide covers all the best methods to multiply your Haworthias successfully at home.
Table of Contents
What Makes Haworthias Easy to Multiply
Native to South Africa, Haworthias naturally form clumping rosettes and produce pups or offsets around their base.
These slow-growing succulents belong to the Asphodelaceae family and thrive in dry, shaded environments.
Their resilient nature makes them ideal candidates for propagation, and most methods are beginner-friendly and low-risk.
The methods below apply to all varieties, including favorites like Haworthia retusa, cooperi, zebra, fasciata, limifolia, cuspidata, cymbiformis, truncata, attenuata, coarctata, and reinwardtii.
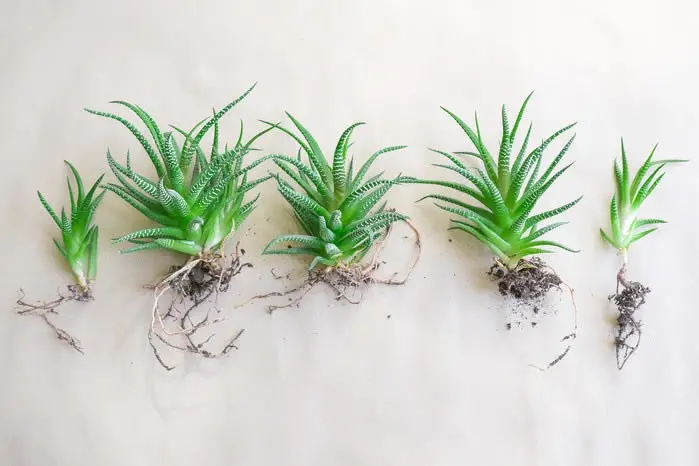
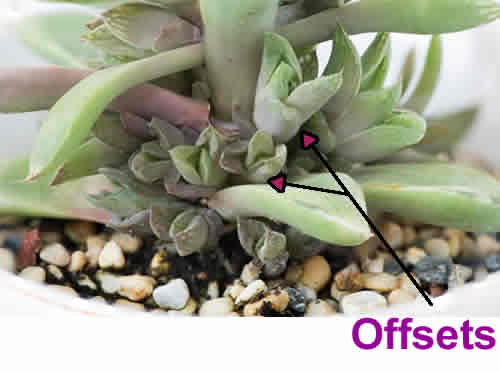
Offset Division (Pups)
The most common and reliable method for propagating Haworthias is by dividing the pups they naturally produce.
-
Gently remove the mother plant from its pot to expose the root system.
-
Locate the small rosettes (pups) growing at the base or along the sides.
-
Use your fingers or a clean, sharp knife to separate the pups, making sure each has some roots attached.
-
Let the cut ends callous for a day if roots were damaged or if you needed to cut.
-
Plant each pup in a small pot filled with well-draining succulent soil.
-
Water lightly after a few days, and then follow a typical Haworthia watering schedule.
Pups may take a few weeks to establish, but they’ll eventually form independent rosettes and start growing steadily.
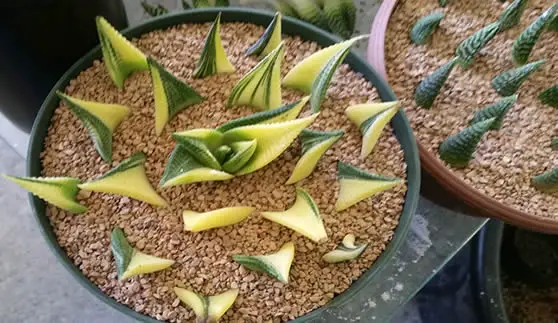
Leaf Cuttings (Less Reliable)
Haworthias can sometimes be propagated from individual leaves, although success rates are lower compared to offsets.
-
Gently twist and remove a healthy, whole leaf from the base.
-
Let it callous over for 3–5 days in a warm, dry place.
-
Place the leaf on top of moist, well-draining soil—do not bury it.
-
Keep the soil slightly moist and provide bright, indirect light.
-
New roots and a baby rosette may form after several weeks or months.
Some varieties like H. cymbiformis and H. cooperi are slightly more responsive to this method than others, but patience is key.
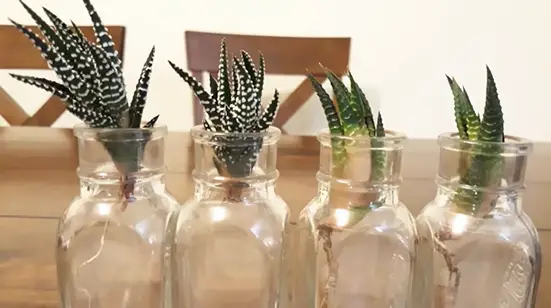
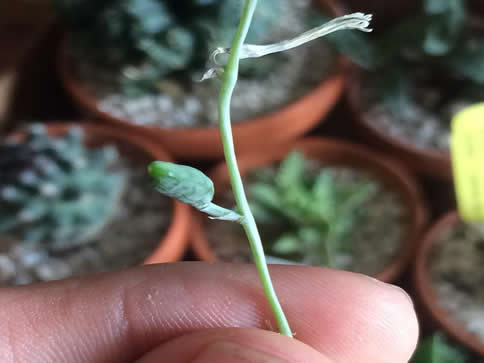
Water Propagation (Bonus Method)
Water propagation is not a traditional method for Haworthias, but it can be done with leaf cuttings or very small pups if you’re curious to try.
-
Submerge only the root end of a pup or the base of a leaf in a jar of water.
-
Use a toothpick or mesh to suspend the plant part above the water surface to avoid rot.
-
Place in bright, indirect light and change the water every few days.
-
Once roots develop, transfer to soil.
Bonus tip: Add a few drops of diluted succulent-safe liquid feed, such as one with an NPK ratio of 2-7-7 like this one, to the water to encourage healthy root growth.
Use caution, as prolonged water exposure can lead to rot if not monitored closely.
Propagation from Seed
Haworthias can be grown from seed, but this method requires more time and patience.
-
Fill a shallow tray with a light, gritty seed-starting mix.
-
Sprinkle the seeds evenly and cover them lightly with a thin layer of sand or vermiculite.
-
Mist gently to moisten the soil and cover with a humidity dome or plastic wrap.
-
Place in indirect light and maintain a temperature between 70–75°F (21–24°C).
-
Germination may take several weeks to a few months.
Seed propagation is ideal for collectors or hobbyists interested in hybridizing Haworthia varieties, but it’s not typically used for fast results.
Outdoor Propagation Tips
If you’re propagating Haworthia outdoors, make sure the environment mimics their native habitat.
Use shaded or semi-shaded areas with excellent drainage, such as in raised beds or containers.
Avoid rain exposure, especially during the rooting phase, to prevent rot.
Spring and early summer are the best times to propagate outdoors, especially if you live in a warm, dry climate.
Common Propagation Mistakes to Avoid
Overwatering cuttings: Let all cut surfaces callous before planting to prevent rot.
Placing in full sun: Intense sunlight can scorch fragile cuttings. Use bright but indirect light instead.
Burying leaf cuttings: This often causes them to rot. Always lay them flat on the surface.
Rushing the process: Haworthias grow slowly, so propagation takes time. Be patient and avoid disturbing developing roots.
Final Thoughts
Propagating Haworthias is an enjoyable way to grow your collection without buying new plants.
Whether you’re dividing pups or experimenting with leaf or water propagation, you’ll find that these little succulents are forgiving, rewarding, and endlessly fun to work with.
With a bit of patience and the right setup, you’ll soon have a thriving tray of tiny Haworthias ready to fill your shelves, windowsills, or plant gifts for friends.
Once your Haworthia plants are rooted be sure to give them teh correct care as outlined in our article How to Care for Haworthia: A Beginner’s Guide to These Charming Succulents.
Thanks for reading! I'm Michael — houseplant fanatic and your Pinterest plant guide.
Follow me on Pinterest for fresh updates 🌿


